 Share
ShareIf you walk into a gym, sometimes you can do your entire workout while people are focused on their abs the entire time.
… like 30 minutes or longer!
What a waste of time.
Your ab training should take no longer than 10 minutes of your workout.
Unfortunately, most people try to get results doing more and more reps instead of simply progressing the exercise.
In fact, most people go about their ab training wrong and end up with a sore back or worse…
… they literally FORCE their stomachs to stick out further!
But you can fix this problem right now.
First, you need to train your abdominals in three dimensions to support its main roles: stabilization, rotation, resisting movement and lending support simultaneously.
That’s why crunches are a waste of time – this exercise only isolates a few muscle groups through one plane of motion. Plus, if you’re not careful, it can make your stomach stick out further.
Today in the Exercise Progressions Super Series, we’re talking Core Stabilization. I have a simple challenge you can do, then it’s onto the best exercise progressions EVER.
Here’s a Quick Challenge
Today’s challenge has two parts. 🙂 Take this quick plank and side plank challenge to test your core strength and endurance right now.
Test 1: Plank
Most people are doing the plank flat out wrong. Either their form is terrible, or they are not focused on activating the right muscles. We’ll fix that in just a minute.
Ready for the challenge?
Here’s how to do it…
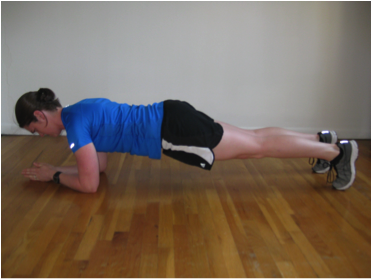
Get down on the floor and into plank position. You should be:
– facedown with your weight resting on your forearms and toes
– forearms aligned with your torso
– elbows directly under your shoulders
– your body in a straight line from neck to ankles
Now hold this position, with correct form for as long as you can.
How did you go?
If you can hold the plank for at least 90 seconds with excellent form, you’re ready to start at Level 2.
If you struggled, or you needed to rest during the time, start at Level 1.
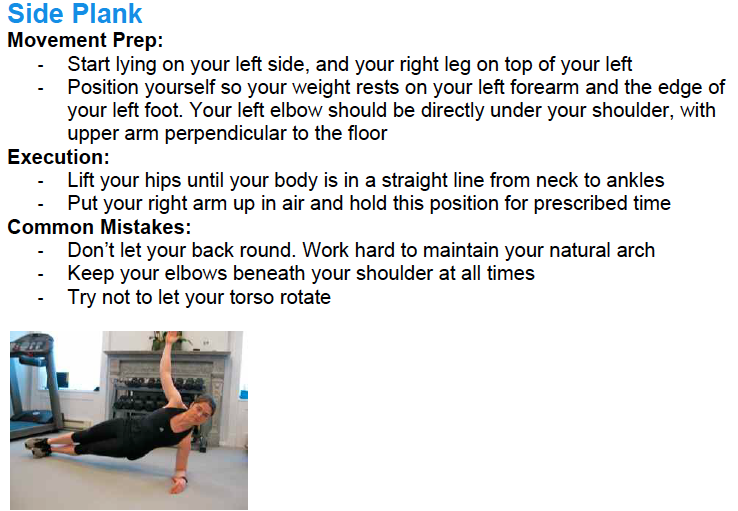
Test 2: Side Plank
First, take a 5 minute break if you just did the plank test.
Get down on the floor and lie on your right side. You should be:
– On your right side with legs straight and your feet stacked (i.e. your left foot on top of your right).
– Your weight should rest on your left forearm and the outside edge of your left foot.
– Keep your left elbow directly under your shoulder, with your upper arm perpendicular to the floor.
– Raise your hips so your body is in a straight line from ankles to neck.
– Keep your shoulders square and perpendicular to the floor, as if your back is being supported by the wall.
– Place your left arm straight up towards the ceiling
Now hold this position, with correct form for as long as you can. If you can hold for 45 seconds or more on both sides, you can start at Level 2.
If you wobbled or struggled to reach 45 seconds, start at Level 1.
7 Ab Progressions You Need To Know
The first 3 levels focus on core stabilization and building your abdominal endurance. You’ll find both a plank and side plank variation you can do for each level.
The next step, Levels 4-7 are tougher dynamic stabilization exercises that target your abs. Dynamic Stabilization involves getting into a position and holding it while doing repetitions of a movement with one or more limbs. I hope that wasn’t too confusing… 😉
You’ll see what I mean when you get to the exercises.
Onwards!
LEVEL ONE: Hard Style Plank & Side Plank
It makes me cringe when I see people at the gym doing a plank with their hips hiked up in the air. It’s a waste of time, and no wonder they don’t feel anything in their abs.
There’s more to a plank than just hanging there for a long as you can. The idea is to activate your entire core, butt, quads and back. Not just your stomach.
Yes, this variation below is harder. But you’ll get WAY more out of the exercise.
Try it:

Ready for the Next Level? When you can hold the hard style plank for 30 seconds and the side plank for 30 seconds non-stop, you can move to level 2.
Are you struggling? You can make it easier! Modify the plank by raising your hands onto a bench, and you can modify the side plank by dropping to your knees. Try to hold the full version for as long as you can before modifying.
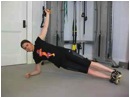
LEVEL TWO: Superman Plank / Side Plank SuperStar
This level will take your core stability to the next level! There are so many challenging variations you can add to a regular plank and side plank – you’ll love it! Here’s a couple of my favorites. Remember, it’s easier to start by taking a foot off the ground, before you try an arm.
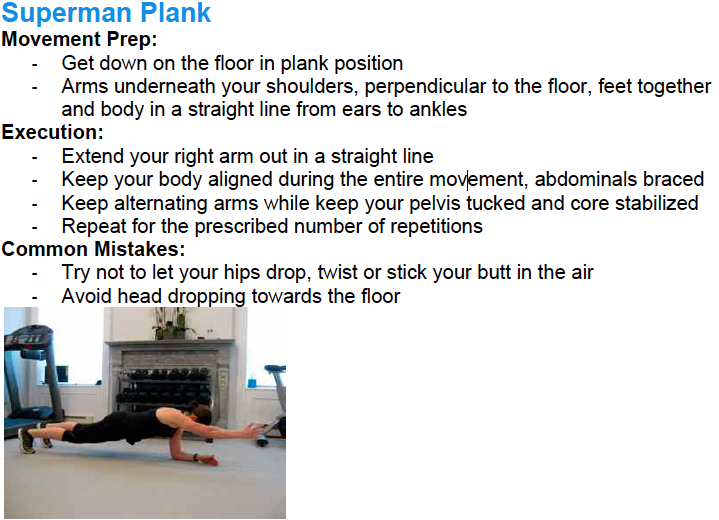
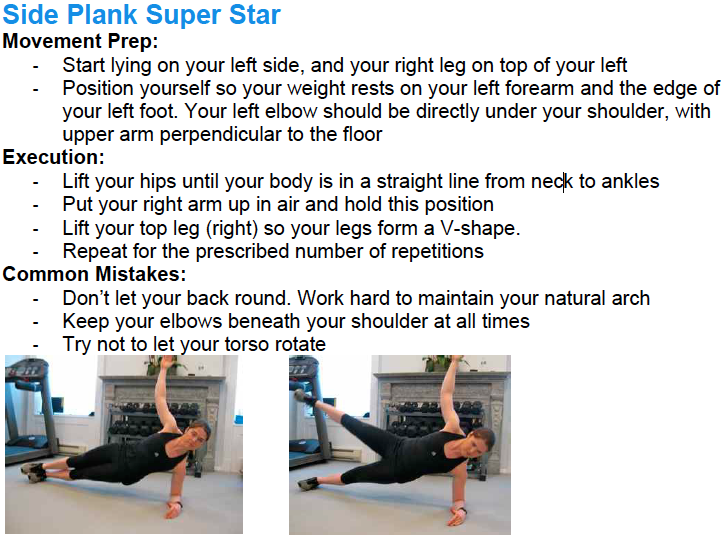
Ready for the Next Level? Once you can do 2 sets of 10 reps on each arm/leg, you’re ready to rock the next challenge. Be patient, it could take you 2-3 weeks to master if you’ve never tried this before.
LEVEL THREE: Plank on Unstable Surface
Now we’re getting tricky by adding an unstable point of contact. You can get creative and use a Stability Ball, TRX, Medicine ball or BOSU to challenge yourself.
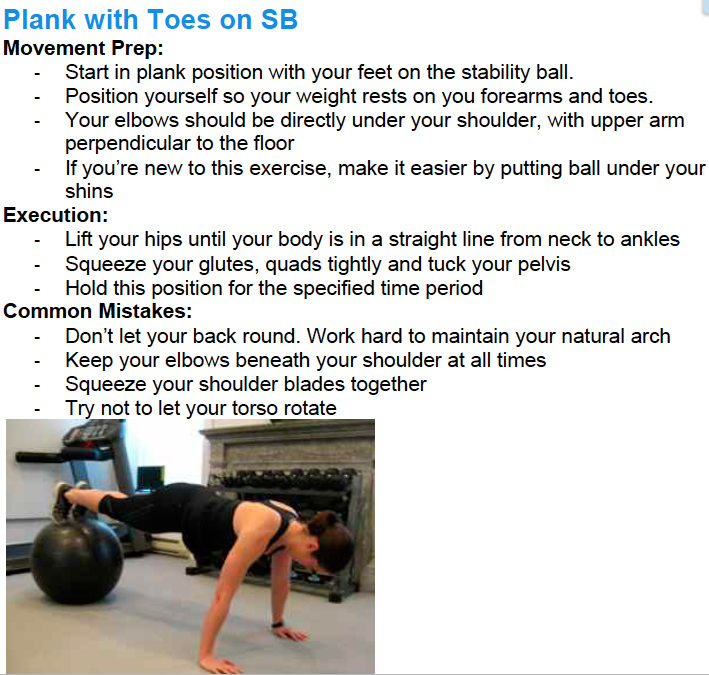
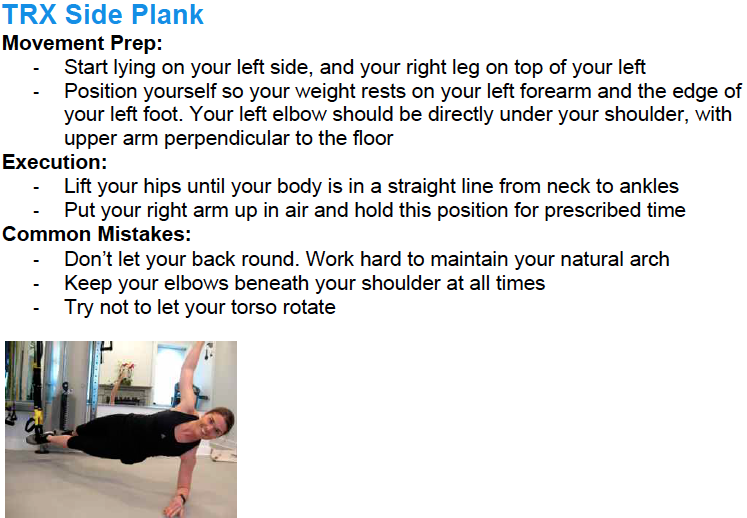
Ready for the Next Level? When you can hold the Stability Ball plank for 30-45 seconds, and side plank for 20-30 seconds, you are ready for the next level. These exercises are tough, so give yourself at least 1-2 weeks to practice.
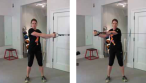
LEVEL FOUR: TRX Jack Knife/TRX Pike
Try the Jackknife before you attempt the Pike. Reason being, the Pike requires more abdominal strength and hamstring flexibility to initiate the movement. You can try the Inchworm too if you don’t have access to equipment.
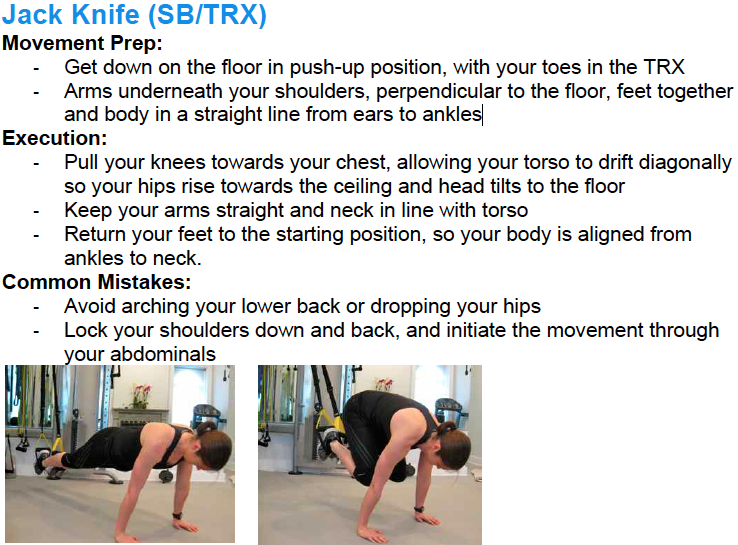
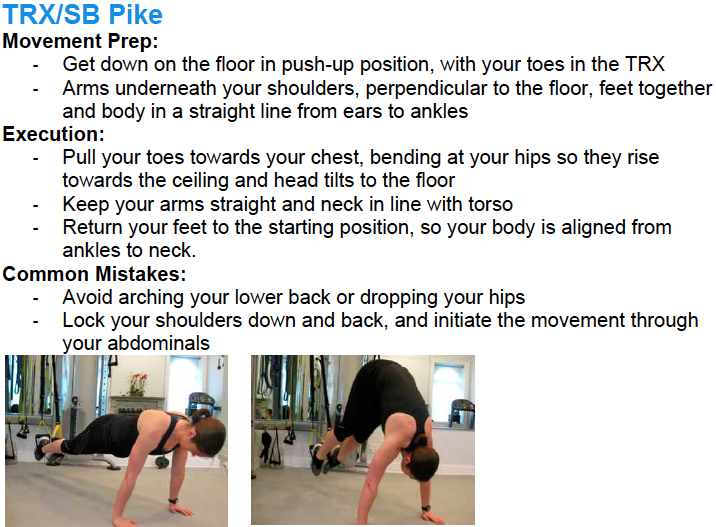
Ready for the Next Level? When you can do 2-3 sets of 15 reps, you’re ready to move on up.
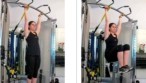
LEVEL FIVE: Stability Ball Mountain Climber
Don’t be surprise…. This exercise is not as easy as it looks. 😉 First time you try it, make sure your feet are spread wide and brace your core hard.
Another cool variation is Mountain Climbers on Sliders or in a TRX. Go for timed sets of 20-30 seconds for a bonus conditioning effect. You’re welcome. 😉
If you’re a runner, this exercise will help improve your speed and endurance. Enjoy!
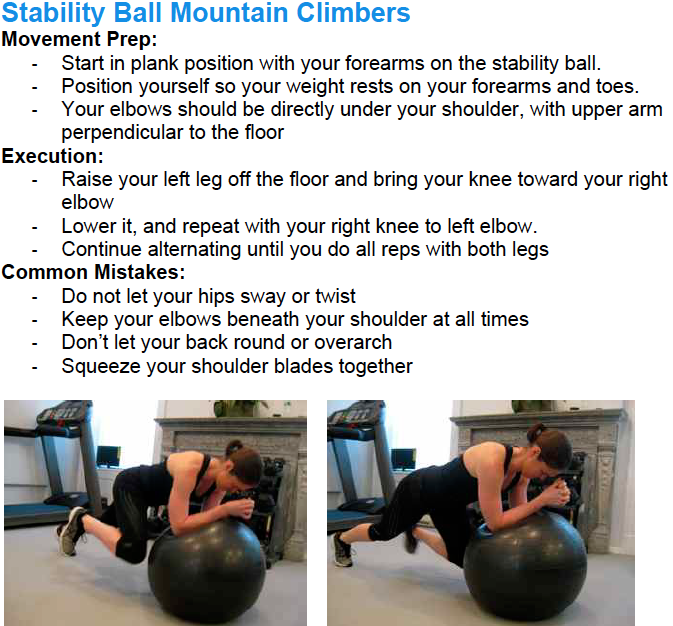
Ready for the Next Level? Aim to do this exercise for at least 2 weeks, before moving to the next level. You should be able to do 12-15 reps on each leg without the Stability Ball wobbling excessively.
LEVEL SIX: Plank Slide Aways
Now we’re getting to the tough exercises! Make sure you squeeze your abs and glutes tightly and work within your range of motion on your first attempt. As you get stronger, you’ll be able to reach out further.
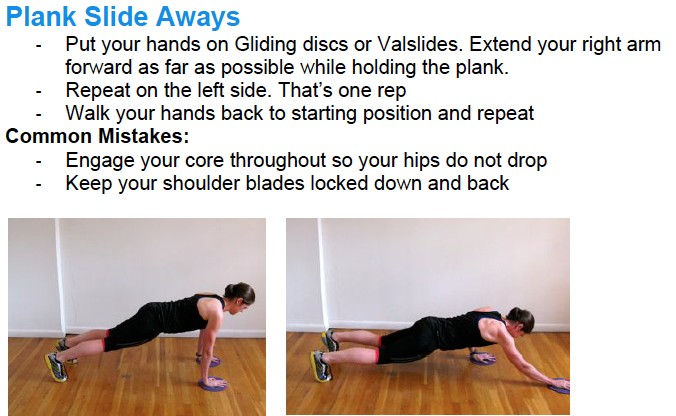
Ready for the Next Level? This level needs at least 3-4 weeks practice. And when you can do 2-3 sets of 6-8 reps on each arm, you’re ready for the next level.
LEVEL SEVEN: Ab Wheel Rollout
I totally love this exercise! The Ab Wheel Rollout is where the magic happens.
Make sure you pause for 1-2 seconds when your arms are extended over your head, and squeeze your abs hard to return to starting position. One thing, NEVER arch your lower back when doing this exercise. Don’t even think about it…
Combine this move with my other favorite ab tricks above and you have a recipe for a strong, sexy stomach. 😉
The Final Word
The idea is to train your abdominals in three dimensions to support its main roles: stabilization, rotation, resisting movement and lending support simultaneously.
Crunches only isolate a few muscle groups through one plane of motion. That’s why it’s a waste of time!
You need to train ALL muscles in your stomach and lower back, through multiple planes of motion. So add exercises like the ones above to your routine and feel the difference while creating hard-rock abs.
You can get done-for-you ab targeted workouts on the next page that will work your core harder than ever and speed up your results…
==> Grab the NEW Powerful 9 Minute Ab Accelerators
Enjoy the workouts and rock on!
Your Coach,
Kate “KV” Vidulich