


 Share
ShareToday the movement we’re focusing on is hinging at the hip joint.
The classic exercise that comes to mind is the deadlift – but it’s not a pure hinge movement. There are better exercises that target this movement pattern, which I’ll show you in just a minute.
The deadlift is #2 on my best exercise ever list. However, if your form is off (even slightly) and you’re not careful, this exercise can destroy your back.
What’s the key ingredient for correct form?
A strong, functional butt.
“What on earth is a functional butt KV?”
Well, one that does it’s job properly – hip extension.
Hinging movements from your hip primarily hits your glutes (your butt) and hamstrings, but also utilizes your erector spinae, transverse abdominus and adductors as stabilizers.
Your gluteal muscles need to be activated and functioning properly – otherwise the surrounding muscles compensate and the trouble and pain begins.
Unfortunately, your glutes don’t magically get strong by spending 7-10 hours a day sitting on them.
Suffering from “gluteal amnesia” – your glutes forgetting how to function properly is a dysfunction that leads to a whole range of other issues, particularly for your lower back.
If you have a “bad” back, those muscles are often very strong, and are compensating for your weak glutes.
Glute bridge (or a progressed version) is a must do exercise for every workout. Remember, get the movement right before you add resistance.
YOUR CHALLENGE RIGHT NOW
Today’s challenge is a two step process.
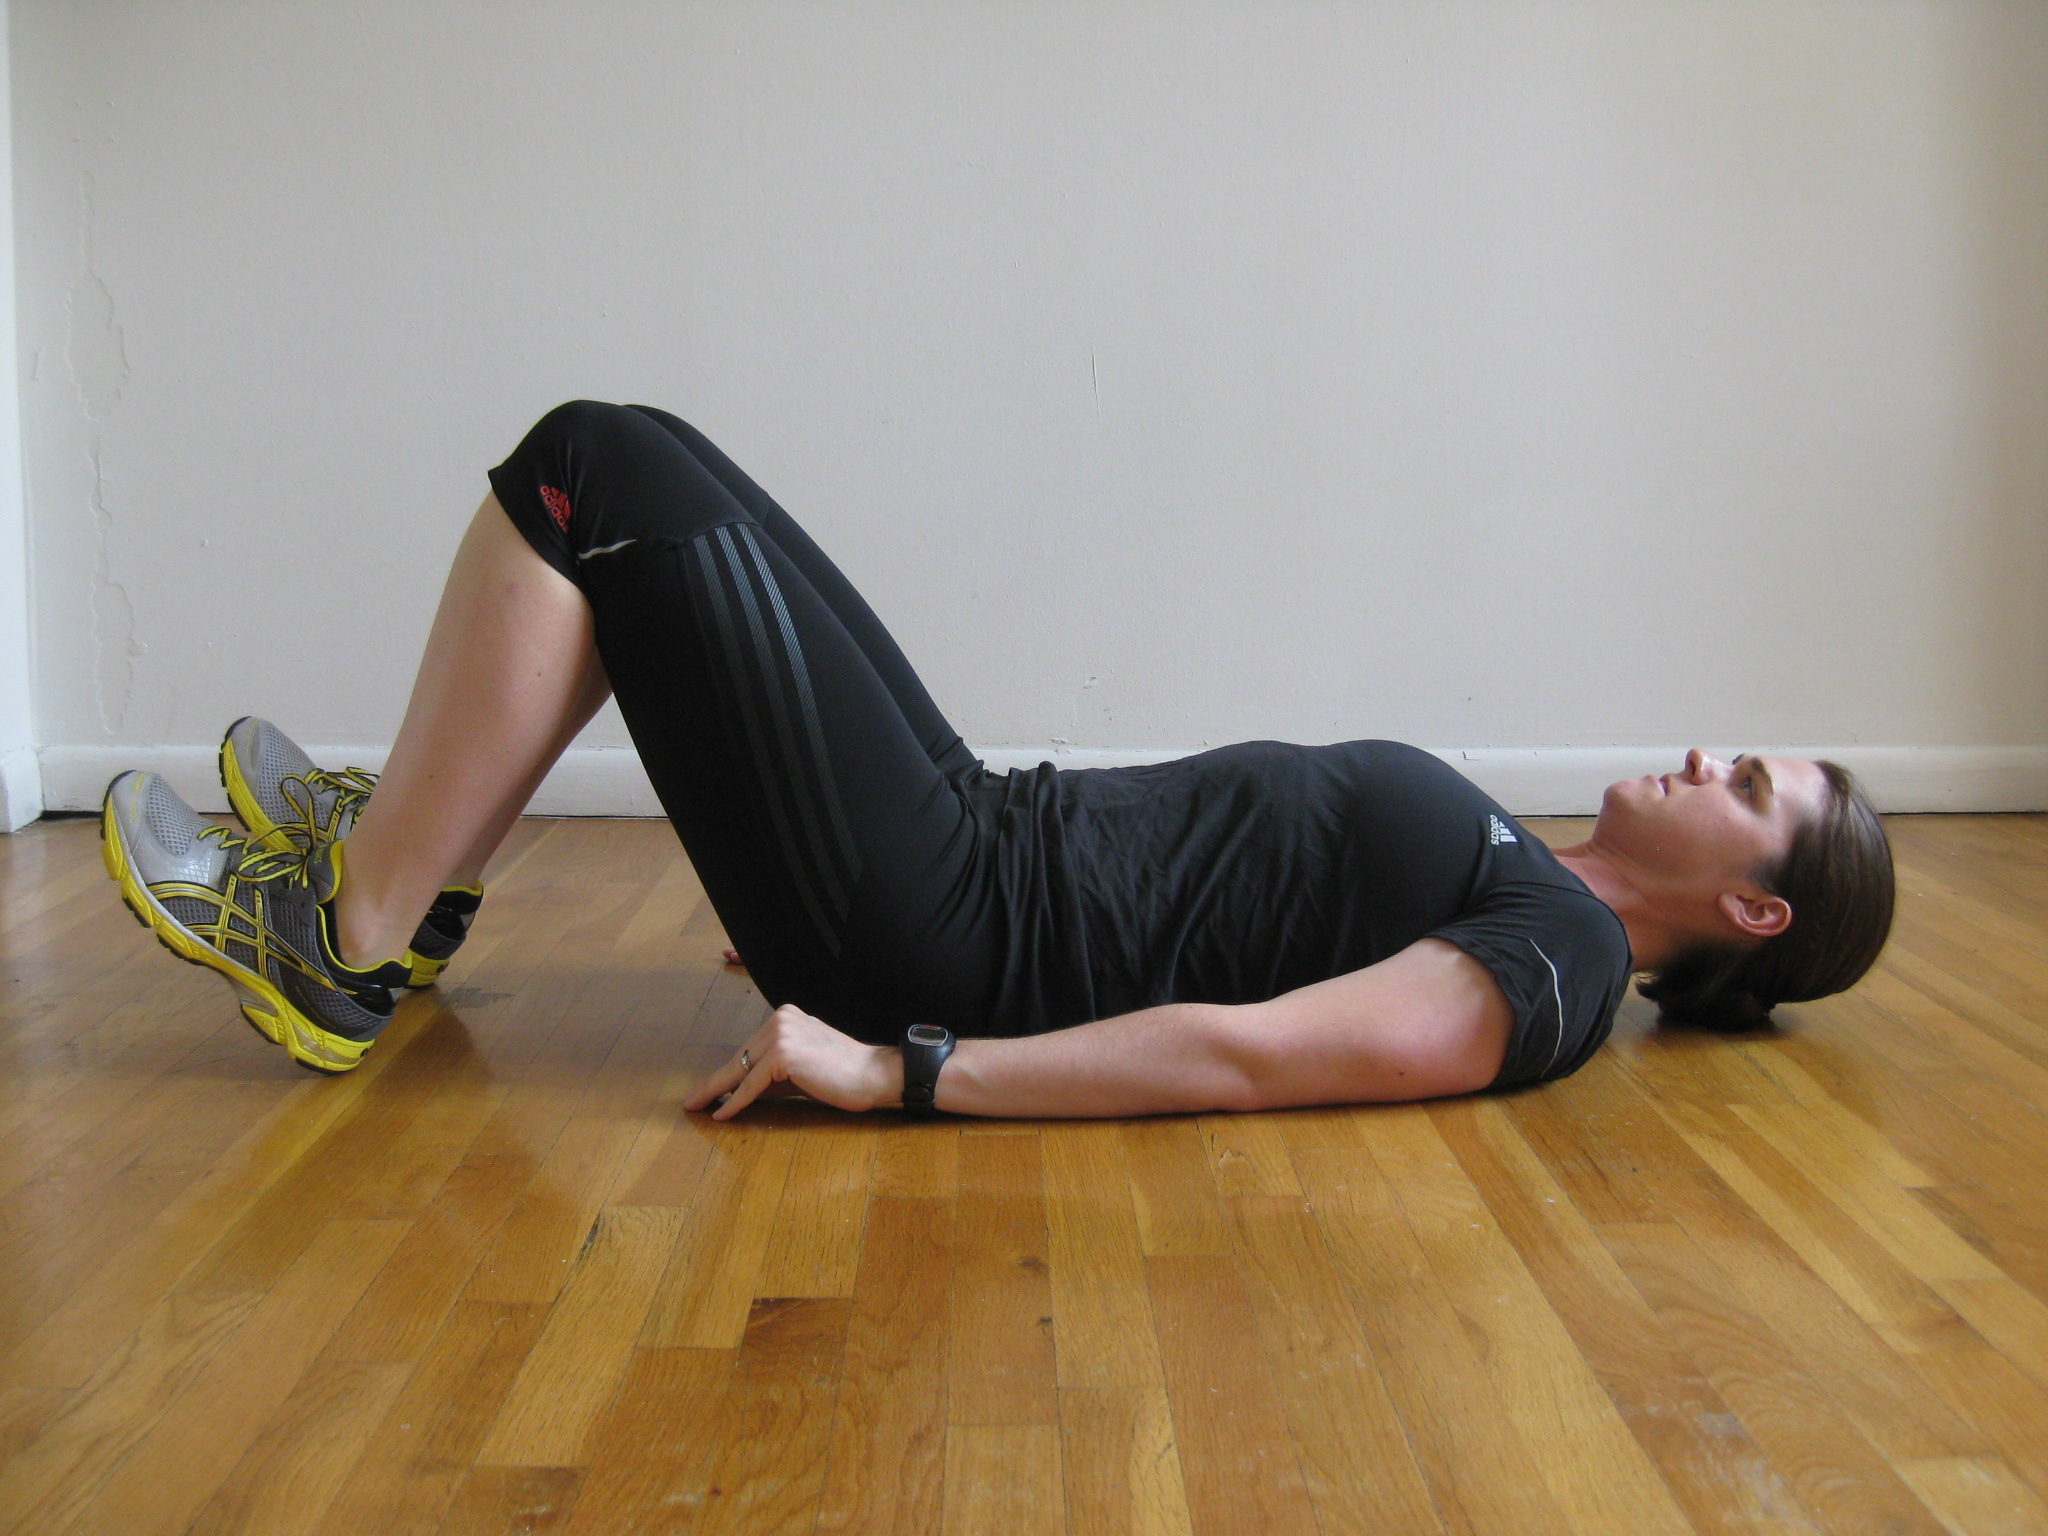
Step #1: Can you do a glute bridge?
– Lie on your back, knees bent, feet on the floor but flexed (toes to ceiling), arms out to the side.
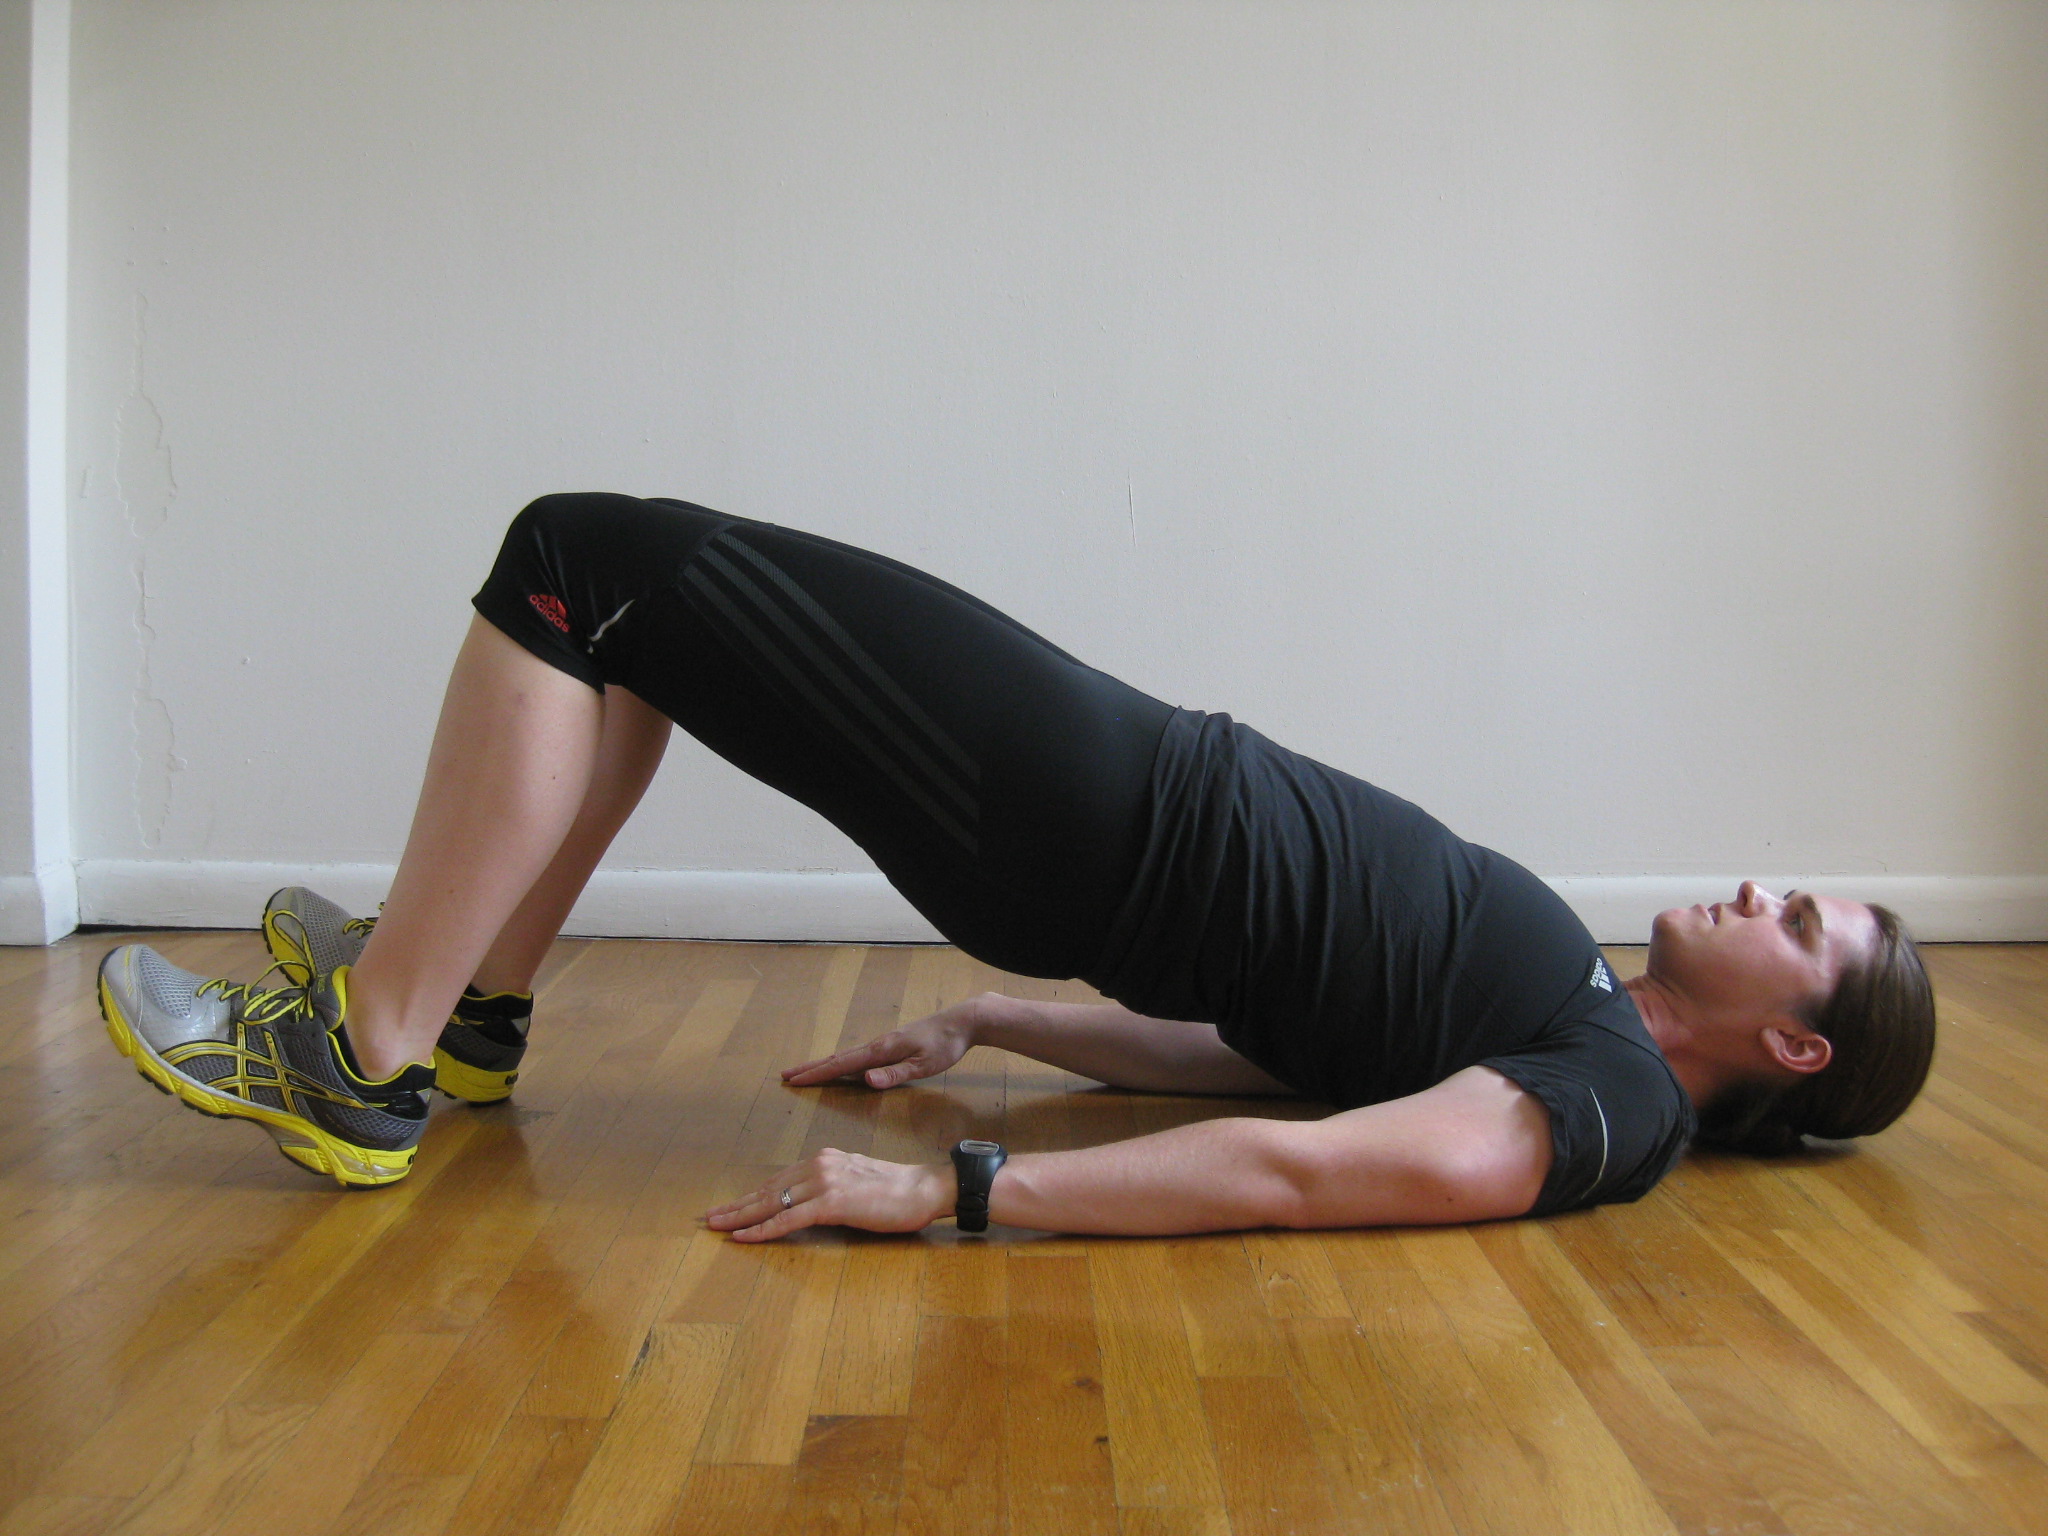
– Squeeze your glutes and raise your hips up until your body forms a straight line from shoulders to knees.
Did anything else tighten up during the movement?
You should feel it in your butt primarily.
If you felt tightness in your back or hamstrings, this means your glutes are not doing their job properly and the best thing to do is work to get your glutes activated.
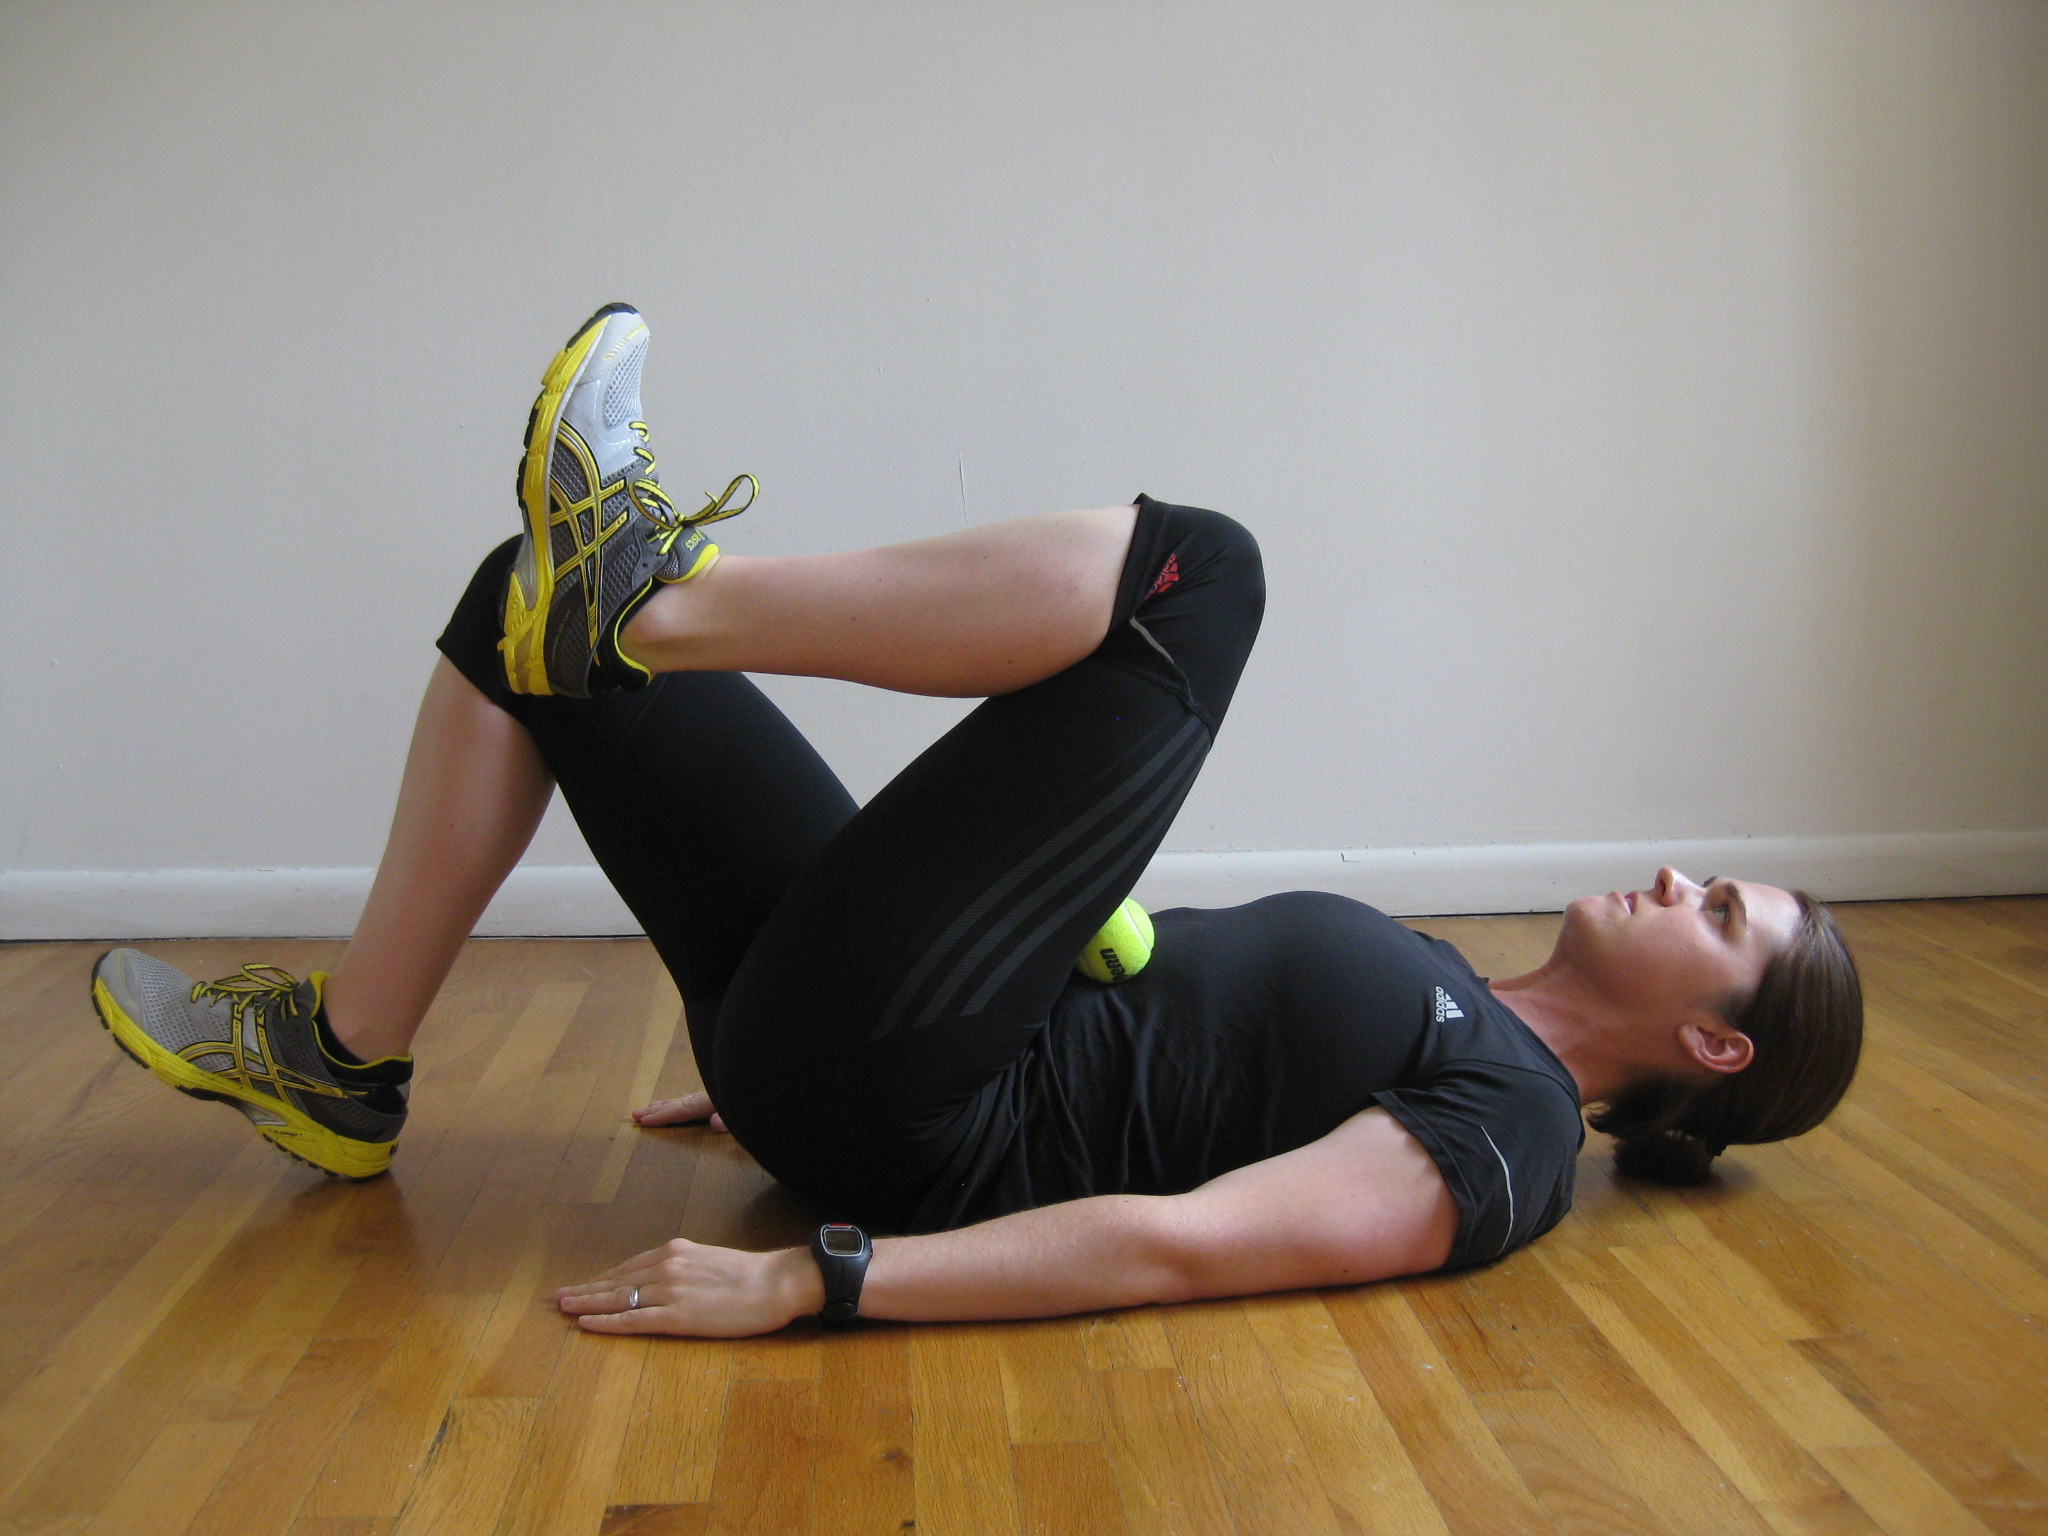
Step #2: The Real Test
The second part requires a ball. A tennis or hockey ball is perfect. This is a test I learnt from Gray Cook, he’s an amazing PT.
– Get into the same position as the previous test described above.
– Hold the ball at the bottom of your left rib cage, and pull your left knee to your chest to hold the ball in position.
– Place your hands out to the side so your left thigh holds the ball against your torso.
– Now try a single leg hip raise, powered entirely by your right glute. (If this causes pain, stop immediately). Repeat on the other leg.

How did you do?
High five if you can do a few reps on each side without losing the ball. Even if your range is minimal, holding the ball this means your glutes were used to get your hips off the floor.
On the other hand, if you struggled, it’s a sign you were using your lower back muscles to compensate for poor glute activation.
Here’s the plan for the Glute Exercise Progressions…
Beginner or advanced, I advise to start at Level One and focus on opening up your hips and getting your glutes firing before progressing. Even if it’s a dynamic warm up exercise, the initial goal is glute activation and the better your glutes work during hip extension movements, the more productive and awesome your whole workout will be.
LEVEL ONE: Hip Flexor Flexibility & Glute Bridge
To open up your hips and maximally activate your glutes, you must have adequate hip flexor flexibility. Most of us fail in this department. This is a great stretch for runners and cyclists!
Start with a hip flexor stretch as shown below, perform 2 sets of 60s each side progressing deeper into the stretch every 20 seconds. Follow the progression shown below.
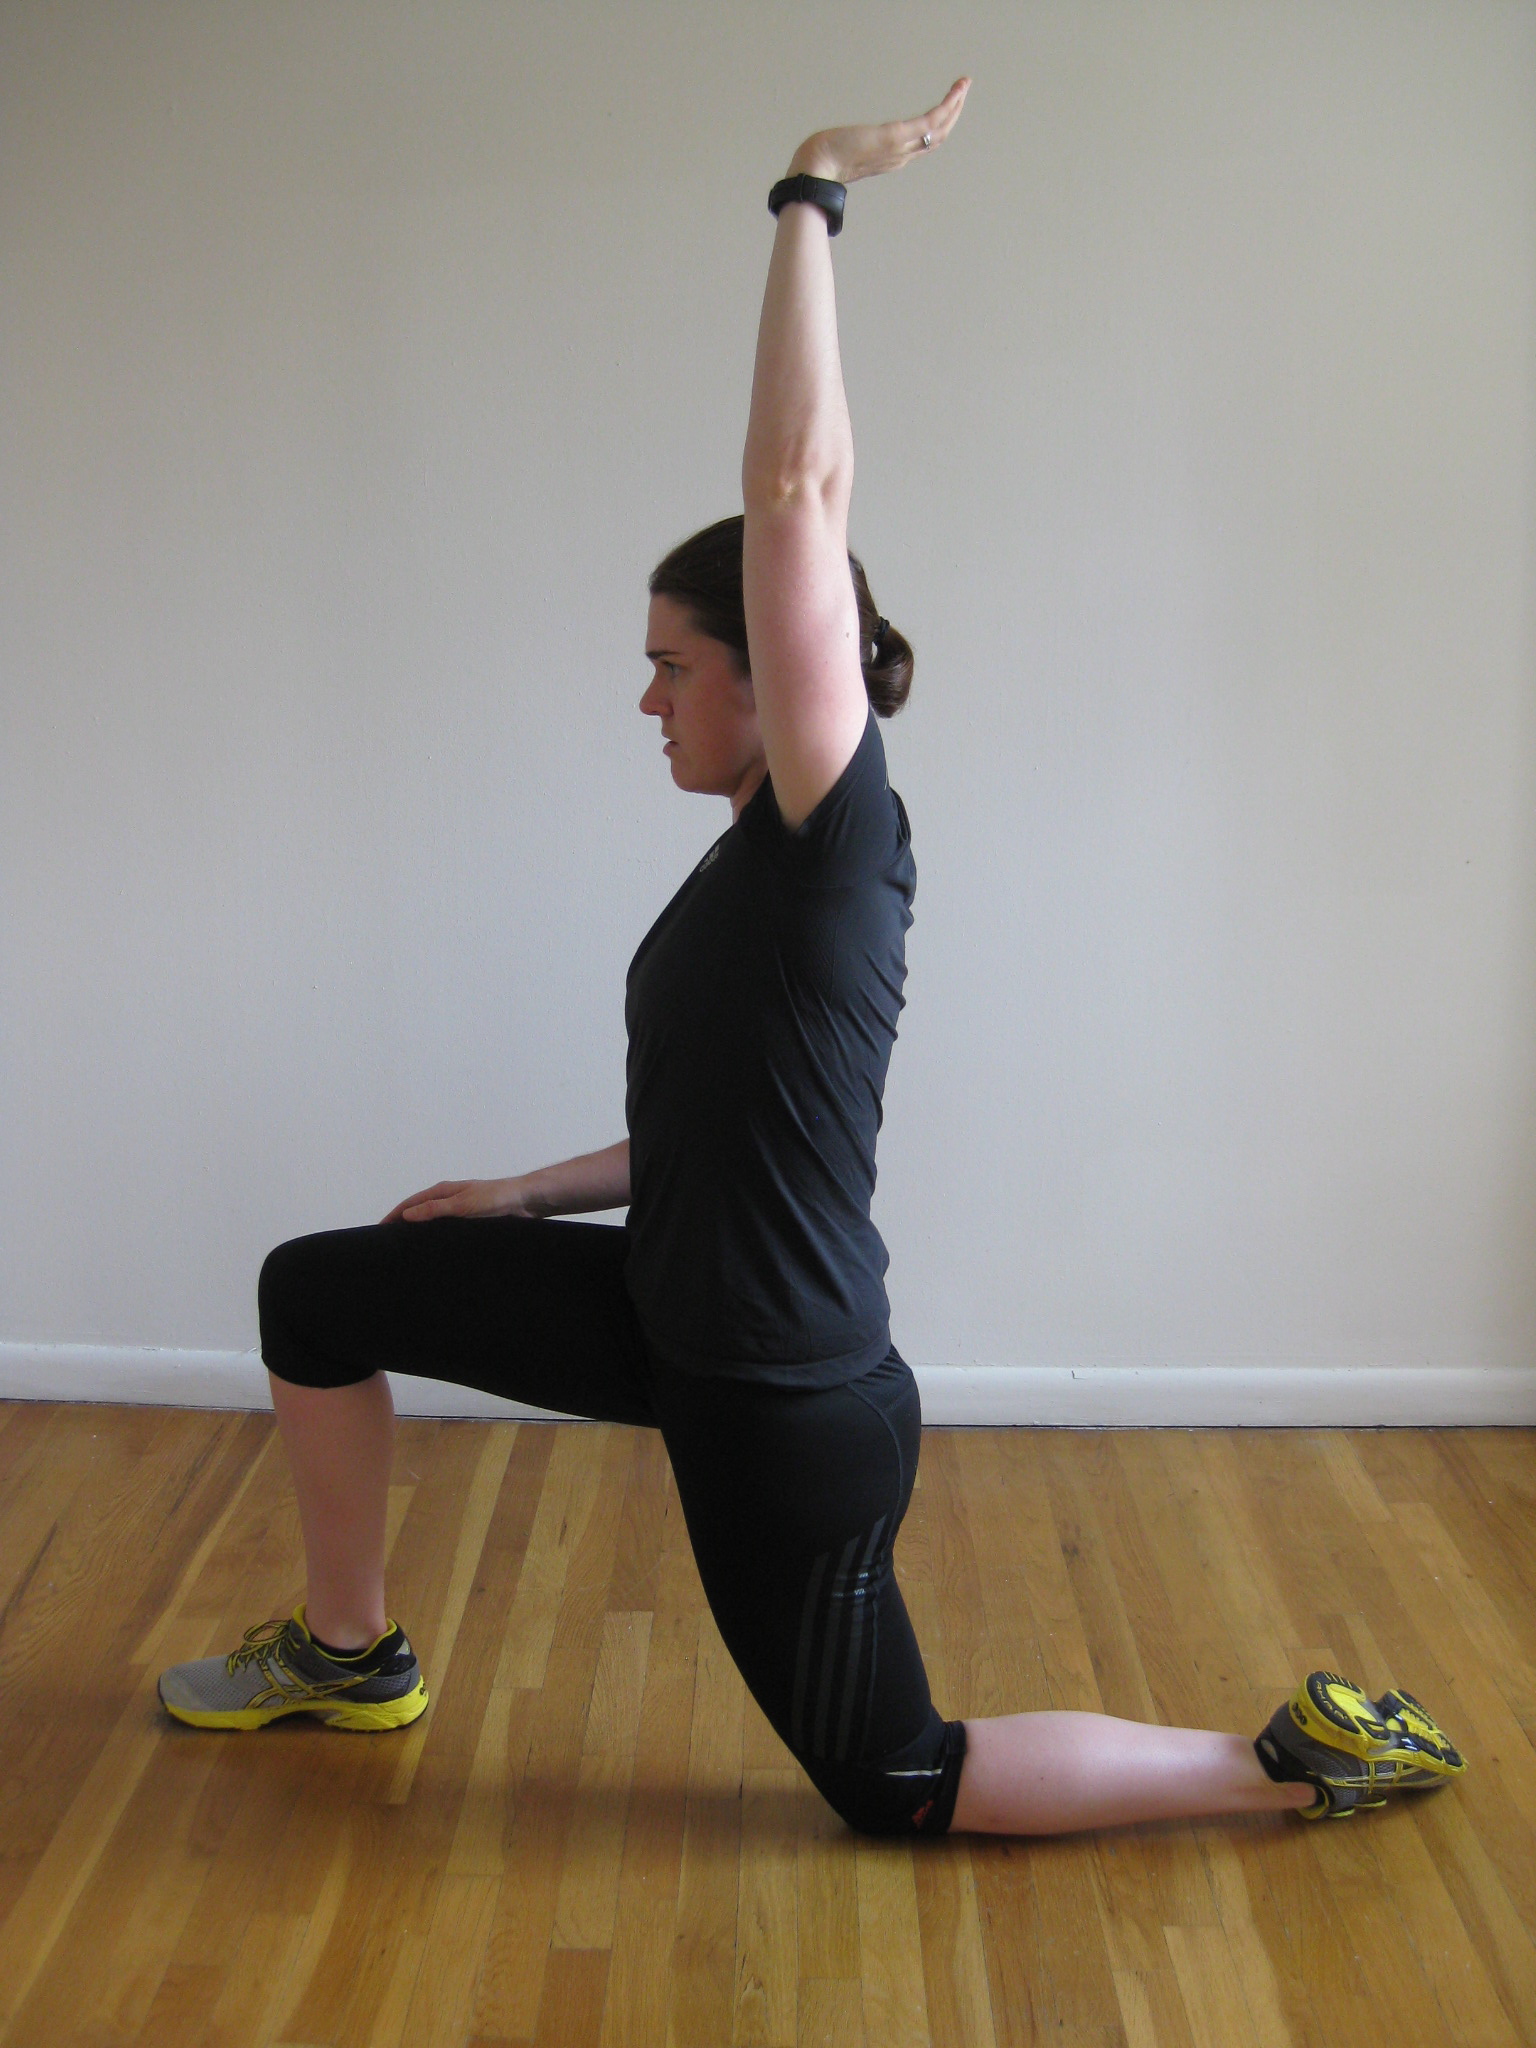
Think tall, and stretch up to the ceiling

Lean forward at the hip

You should feel a huge stretch in your side
Glute Bridge
The most important aspect of the glute bridge is to squeeze and power the hip lift with your glutes. Get into the same position as the initial test and concentrate on getting your glutes activated. Hold the top position (isometric hip extension) for 10 seconds.
Are you ready for the next level?
Once you can do two sets of 15 reps of glute bridge, you’re ready to progress to the next level. You can try a single leg glute bridge as another exercise progression. And if you have a Swiss Ball, place it under your feet and use it for an added challenge.
LEVEL TWO: TRX or Swiss Ball Hamstring Curl
The next level is to designed to challenge you by adding instability. This exercise requires your posterior chain (hamstrings, glutes, lower back) to work in co-ordination with your core. This is harder than it looks – make sure you keep yourself steady and your core abdominal muscles engaged.
The Movement
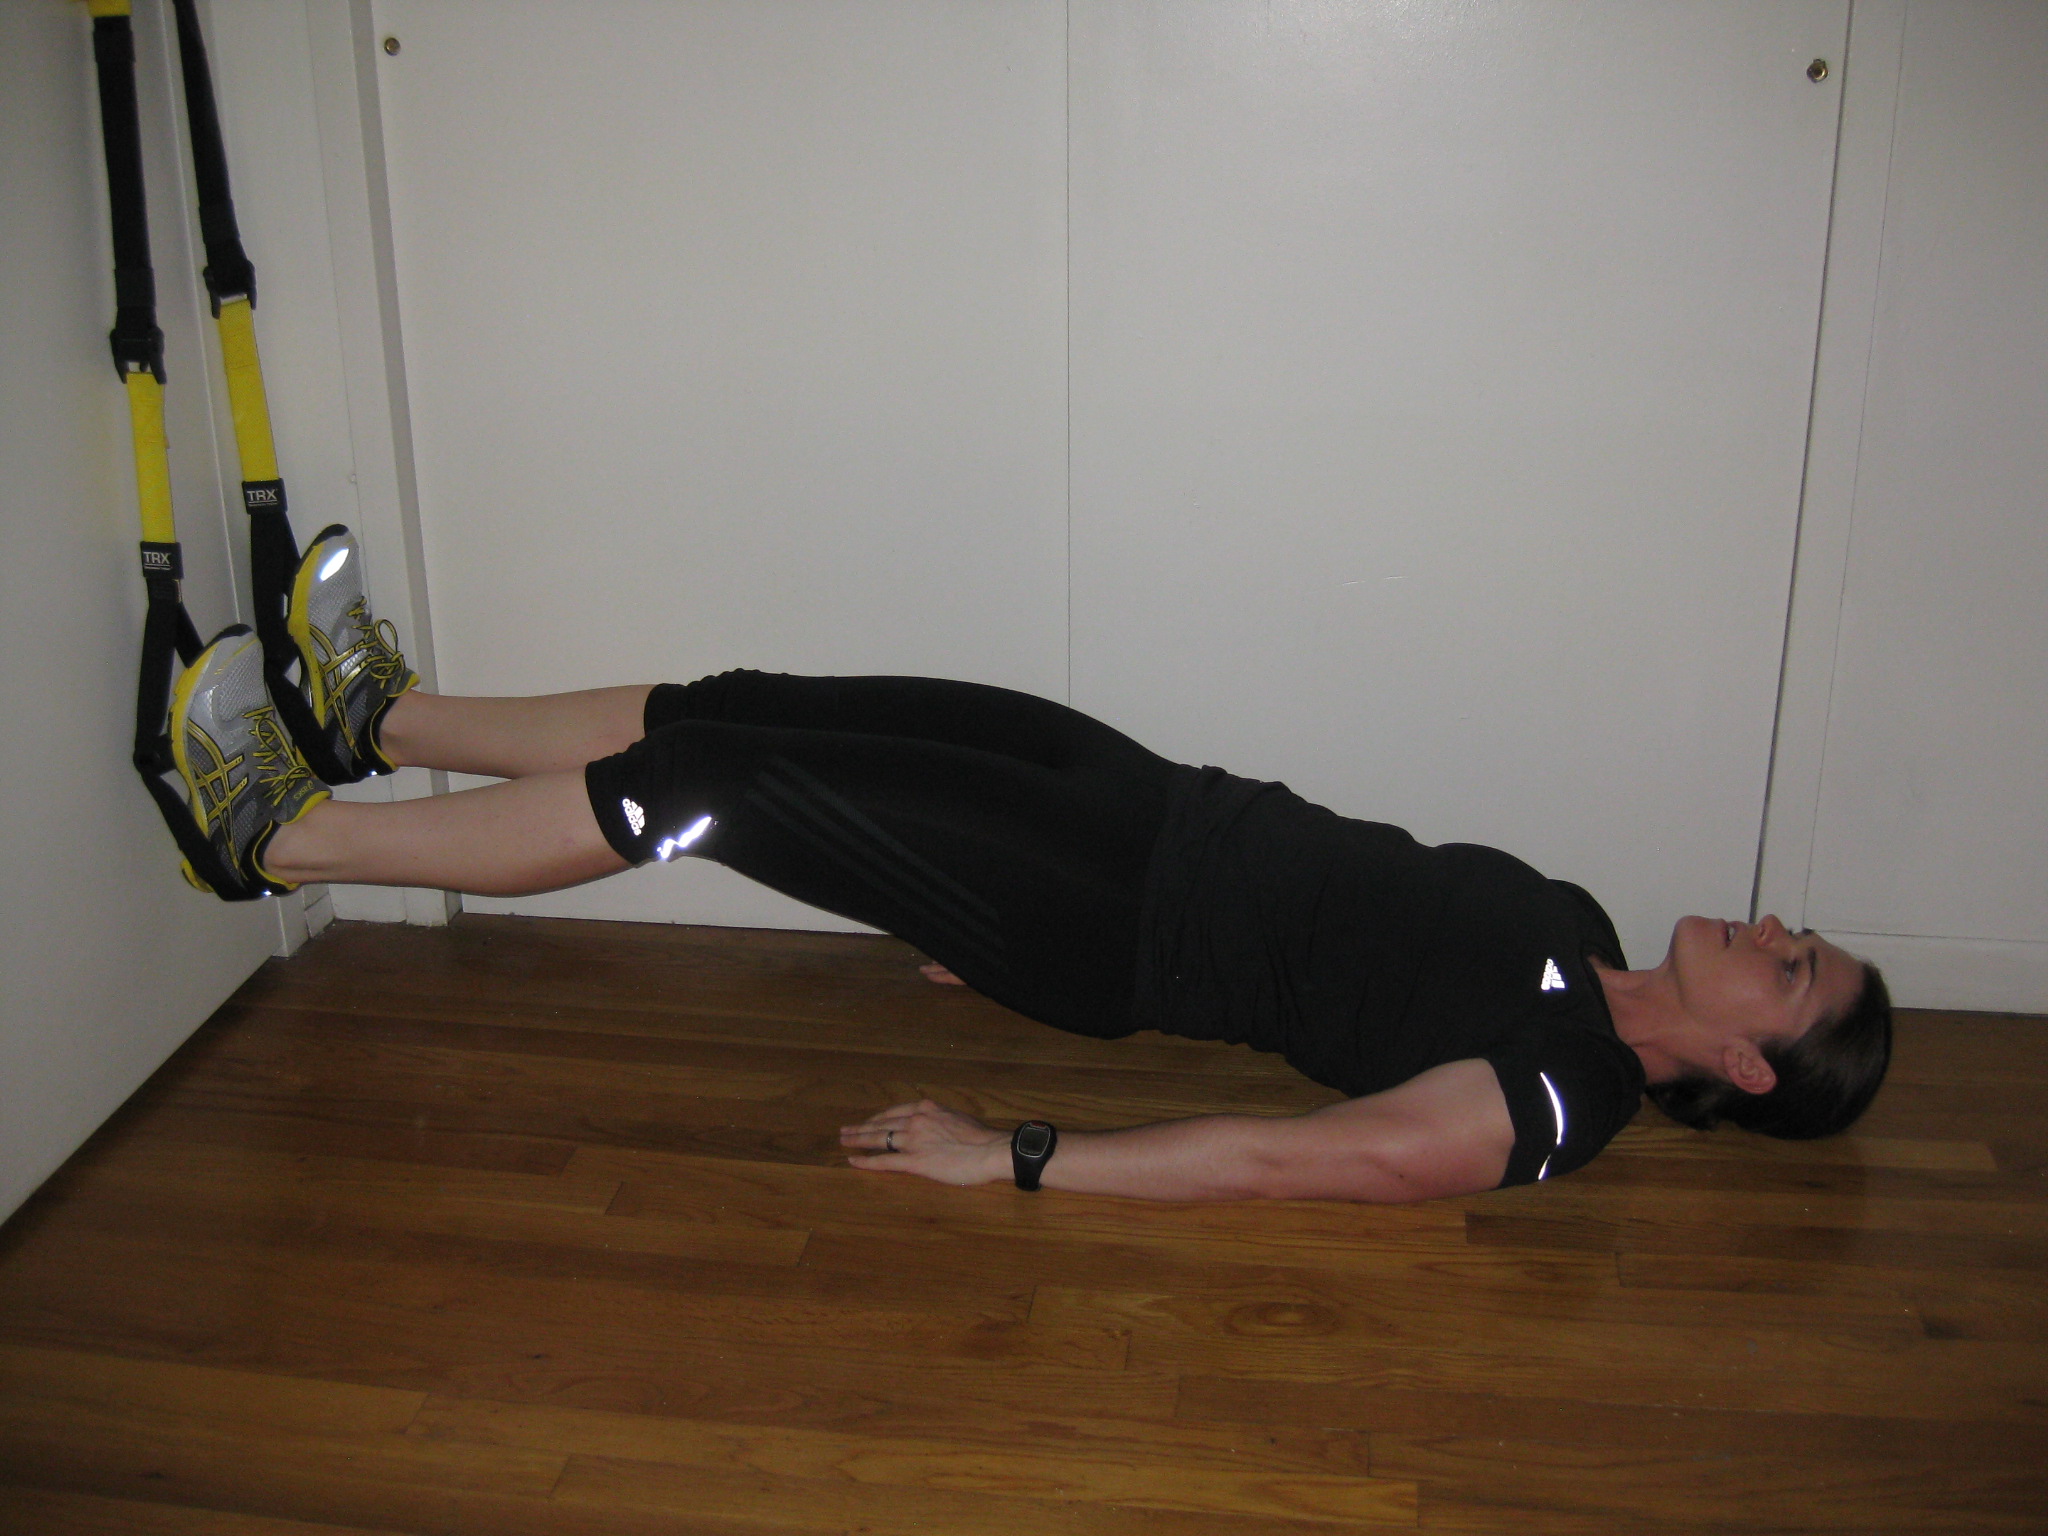

– Get into the same position as glute bridge above. Place your heels either in a TRX, on a Swiss Ball.
– Squeeze and fire your glutes and raise your hips up until your body forms a straight line from shoulders to knees.
– From this position, keep your hips extended and bend your knees, bringing your heels towards your butt.
– Then straighten your legs again while keeping your hips extended.
For an added challenge, put your hands across your chest, but if it’s too tricky spread your arms out to the side.
Ready for the Next Level? When you can do 3 sets of 15-20 reps, keeping your hips off the ground the entire set -> you’re ready for the next level.
LEVEL THREE: Bulgarian Goat Belly Swing
Here’s a great way to practice loading and firing through your hips. The exercise name is crazy and it might look a bit silly, but it’s an awesome way to learn the hinge movement! If you’re struggling with your Kettlebell swings, this is the perfect regression for you.
And I didn’t create this exercise… All the credit goes to my friend Dan John. 🙂
The Movement
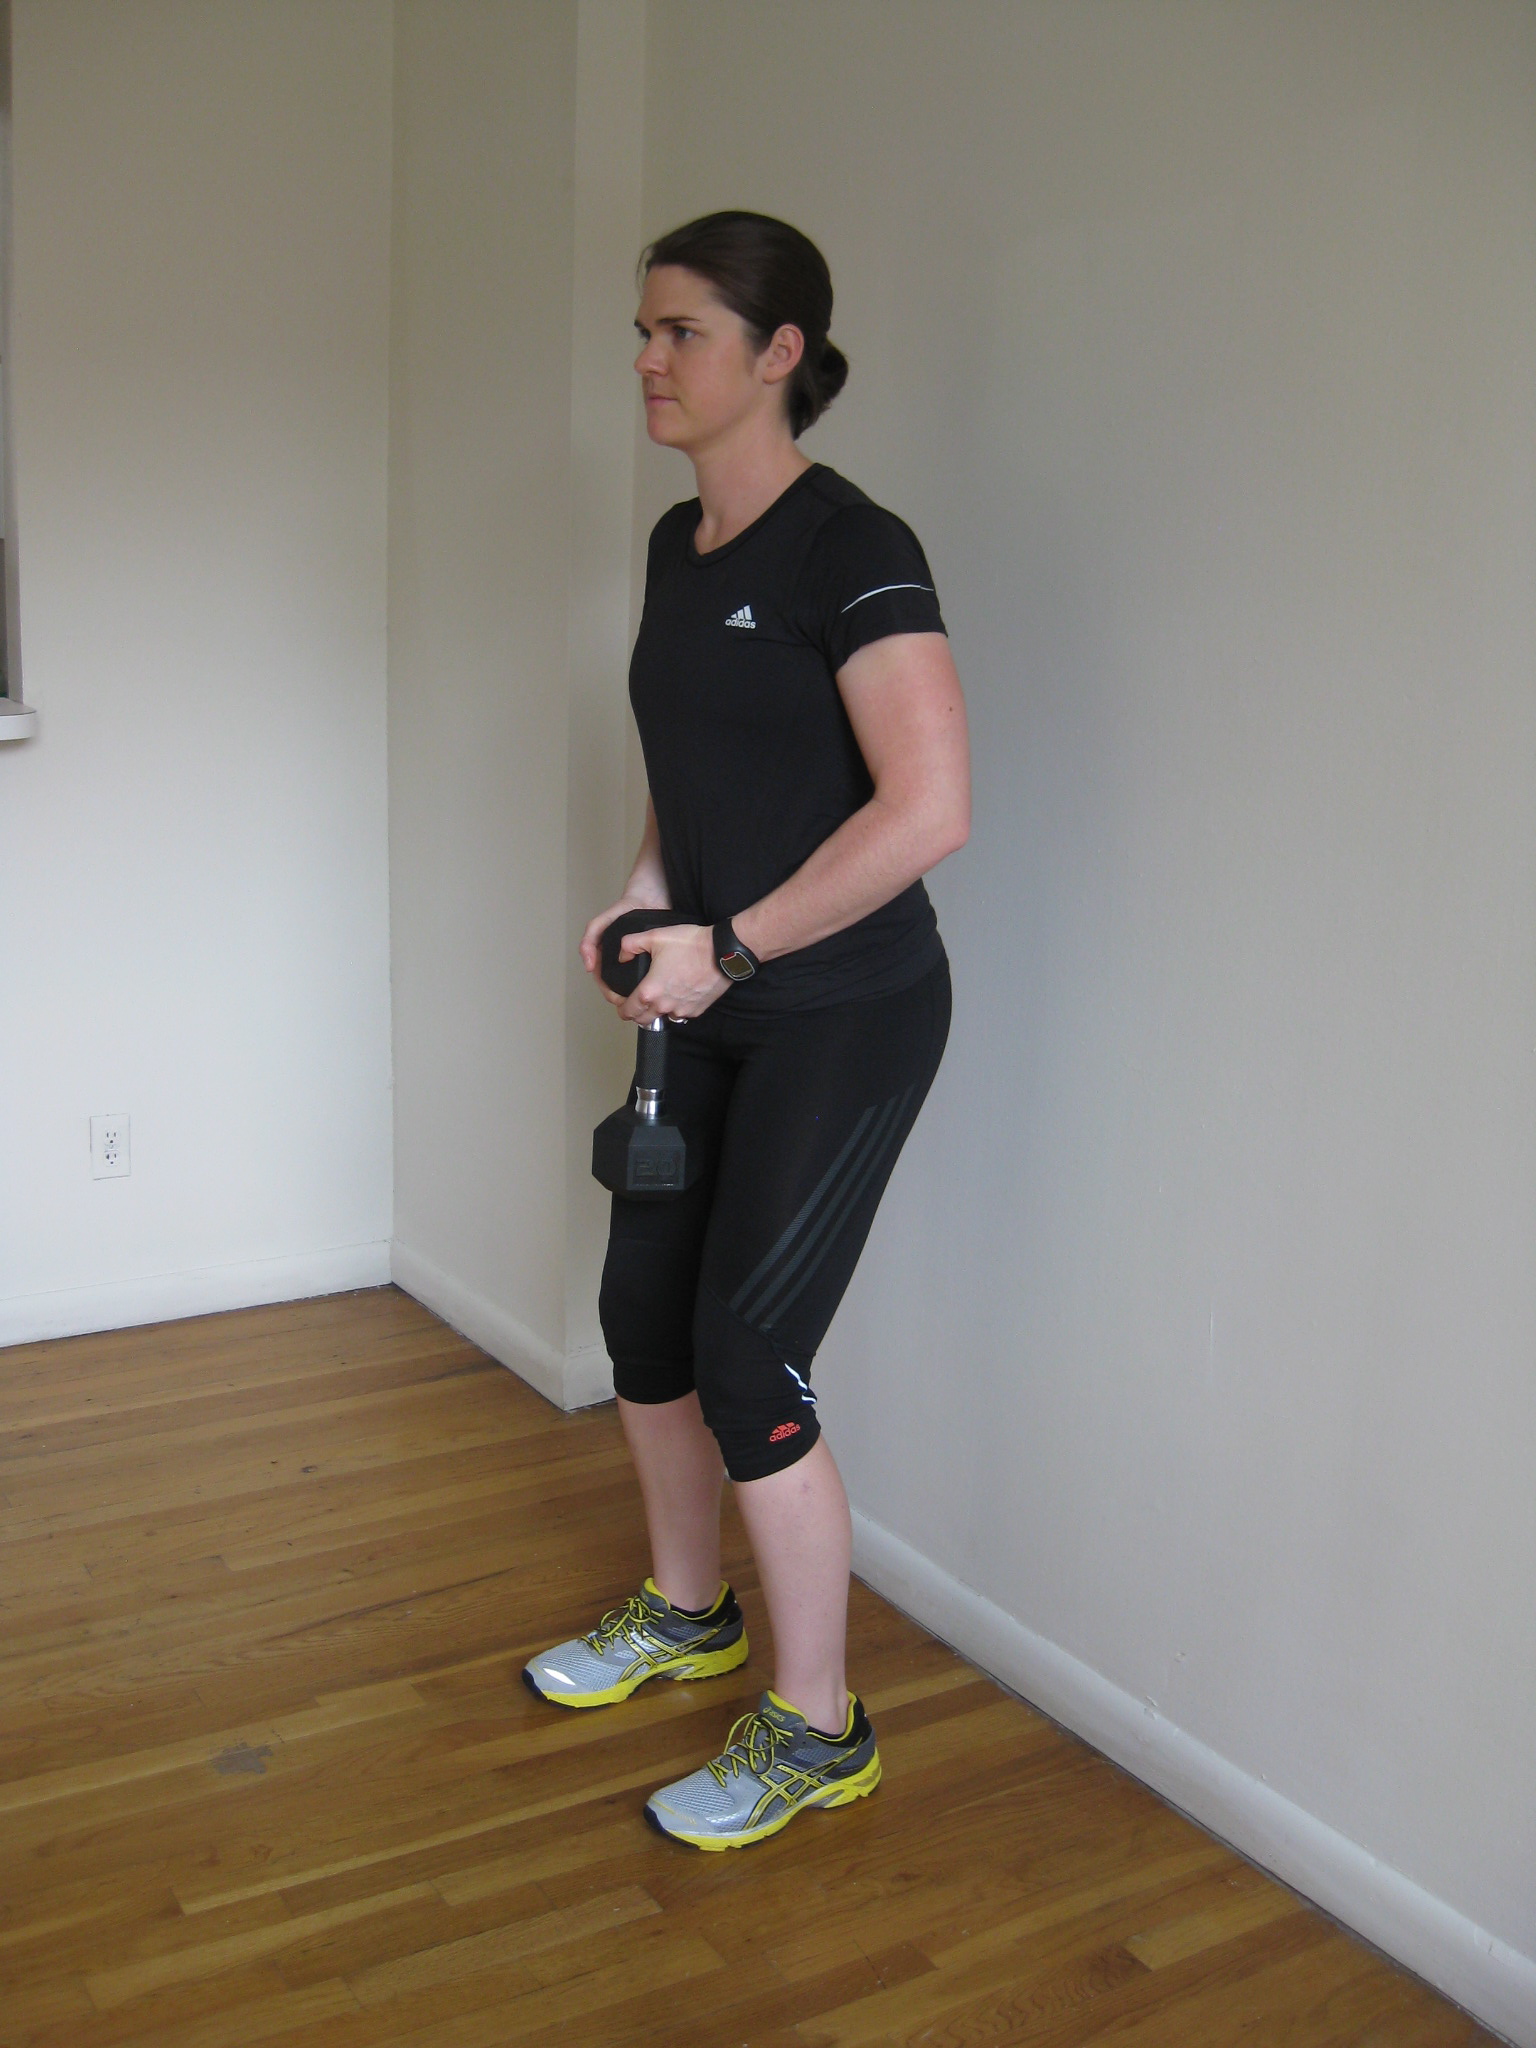

Think butt to the wall. Don’t bend your knees
– Stand a foot length away with your back facing the wall.
– Hold a kettlebell or dumbbell in front of your stomach, keep your chest up.
– Maintain a soft knee, and push your hips back towards the wall.
– Your butt should lightly touch the wall.
If you try to squat you will miss you wall. Work to increase your mobility. Make sure you have minimal knee bend and maximal hip range of motion.
Ready for the Next Level? This is a basic exercise, so spend at least 1-2 weeks practicing this exercise if you’re new to the hinge movement.
When you can do 3 sets of 12 reps without feeling strain in your back and hitting the wall with your butt every time, you’re ready to rock Level 4.
LEVEL FOUR & BEYOND: Romanian Deadlift
This is progression from the basic action of loading and firing from your hips. Now we add weighted resistance. Use a barbell if you’re at the gym, I’m demonstrating below with a dumbbell.
It’s my go-to exercise for training the hinge movement pattern. Enjoy!
The Movement
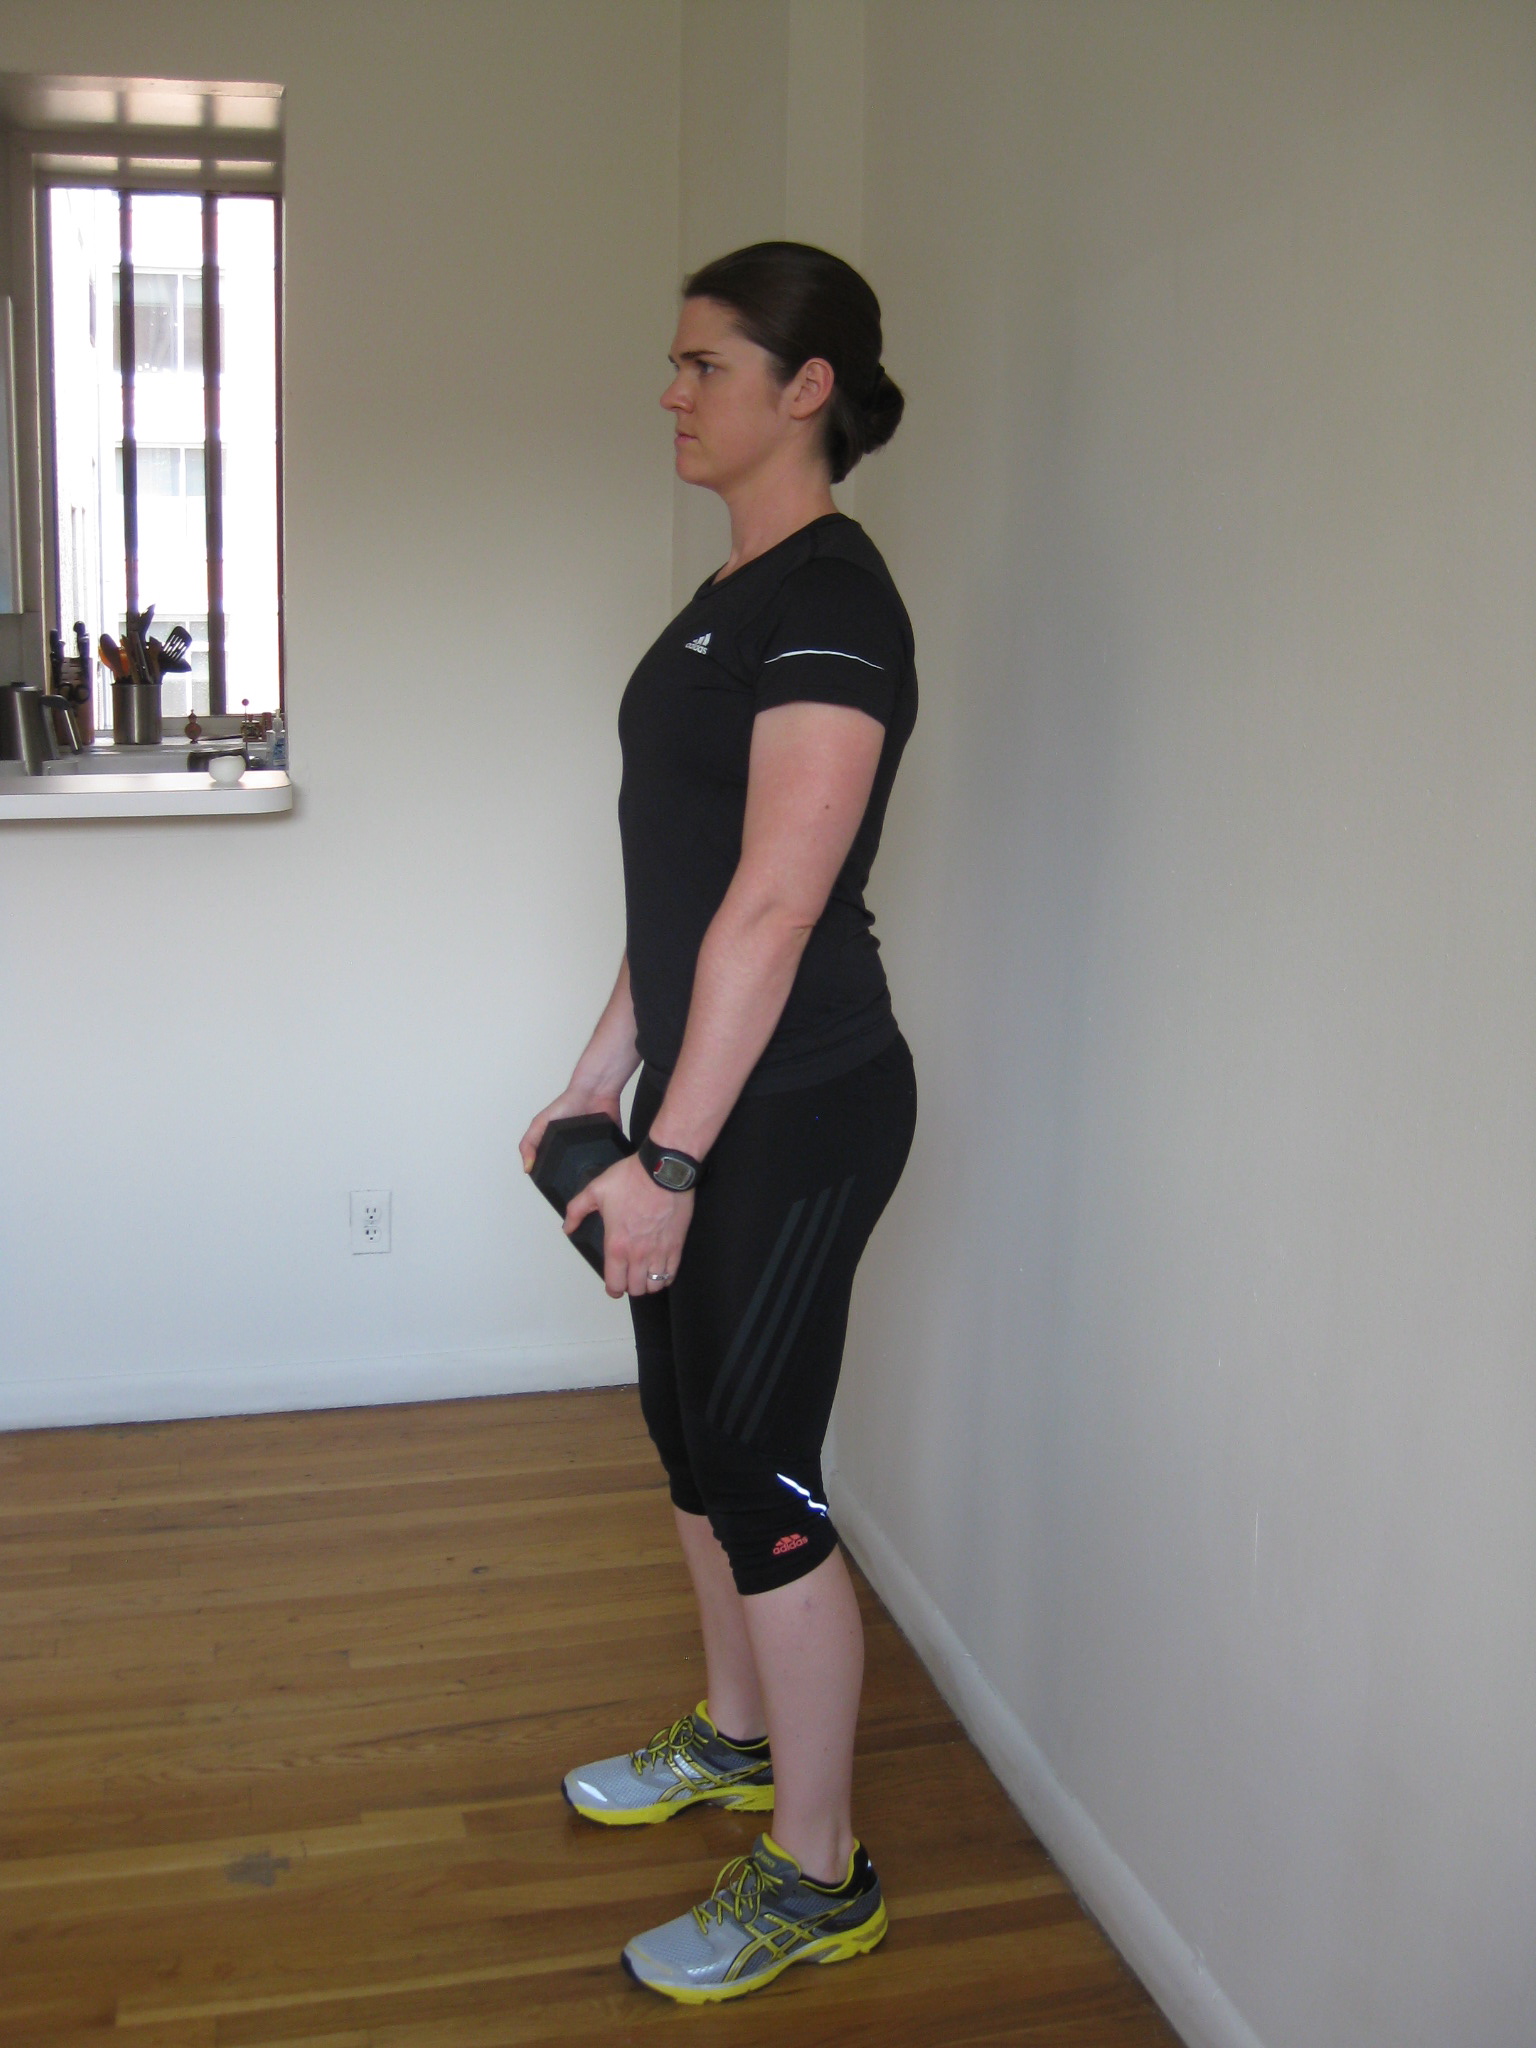
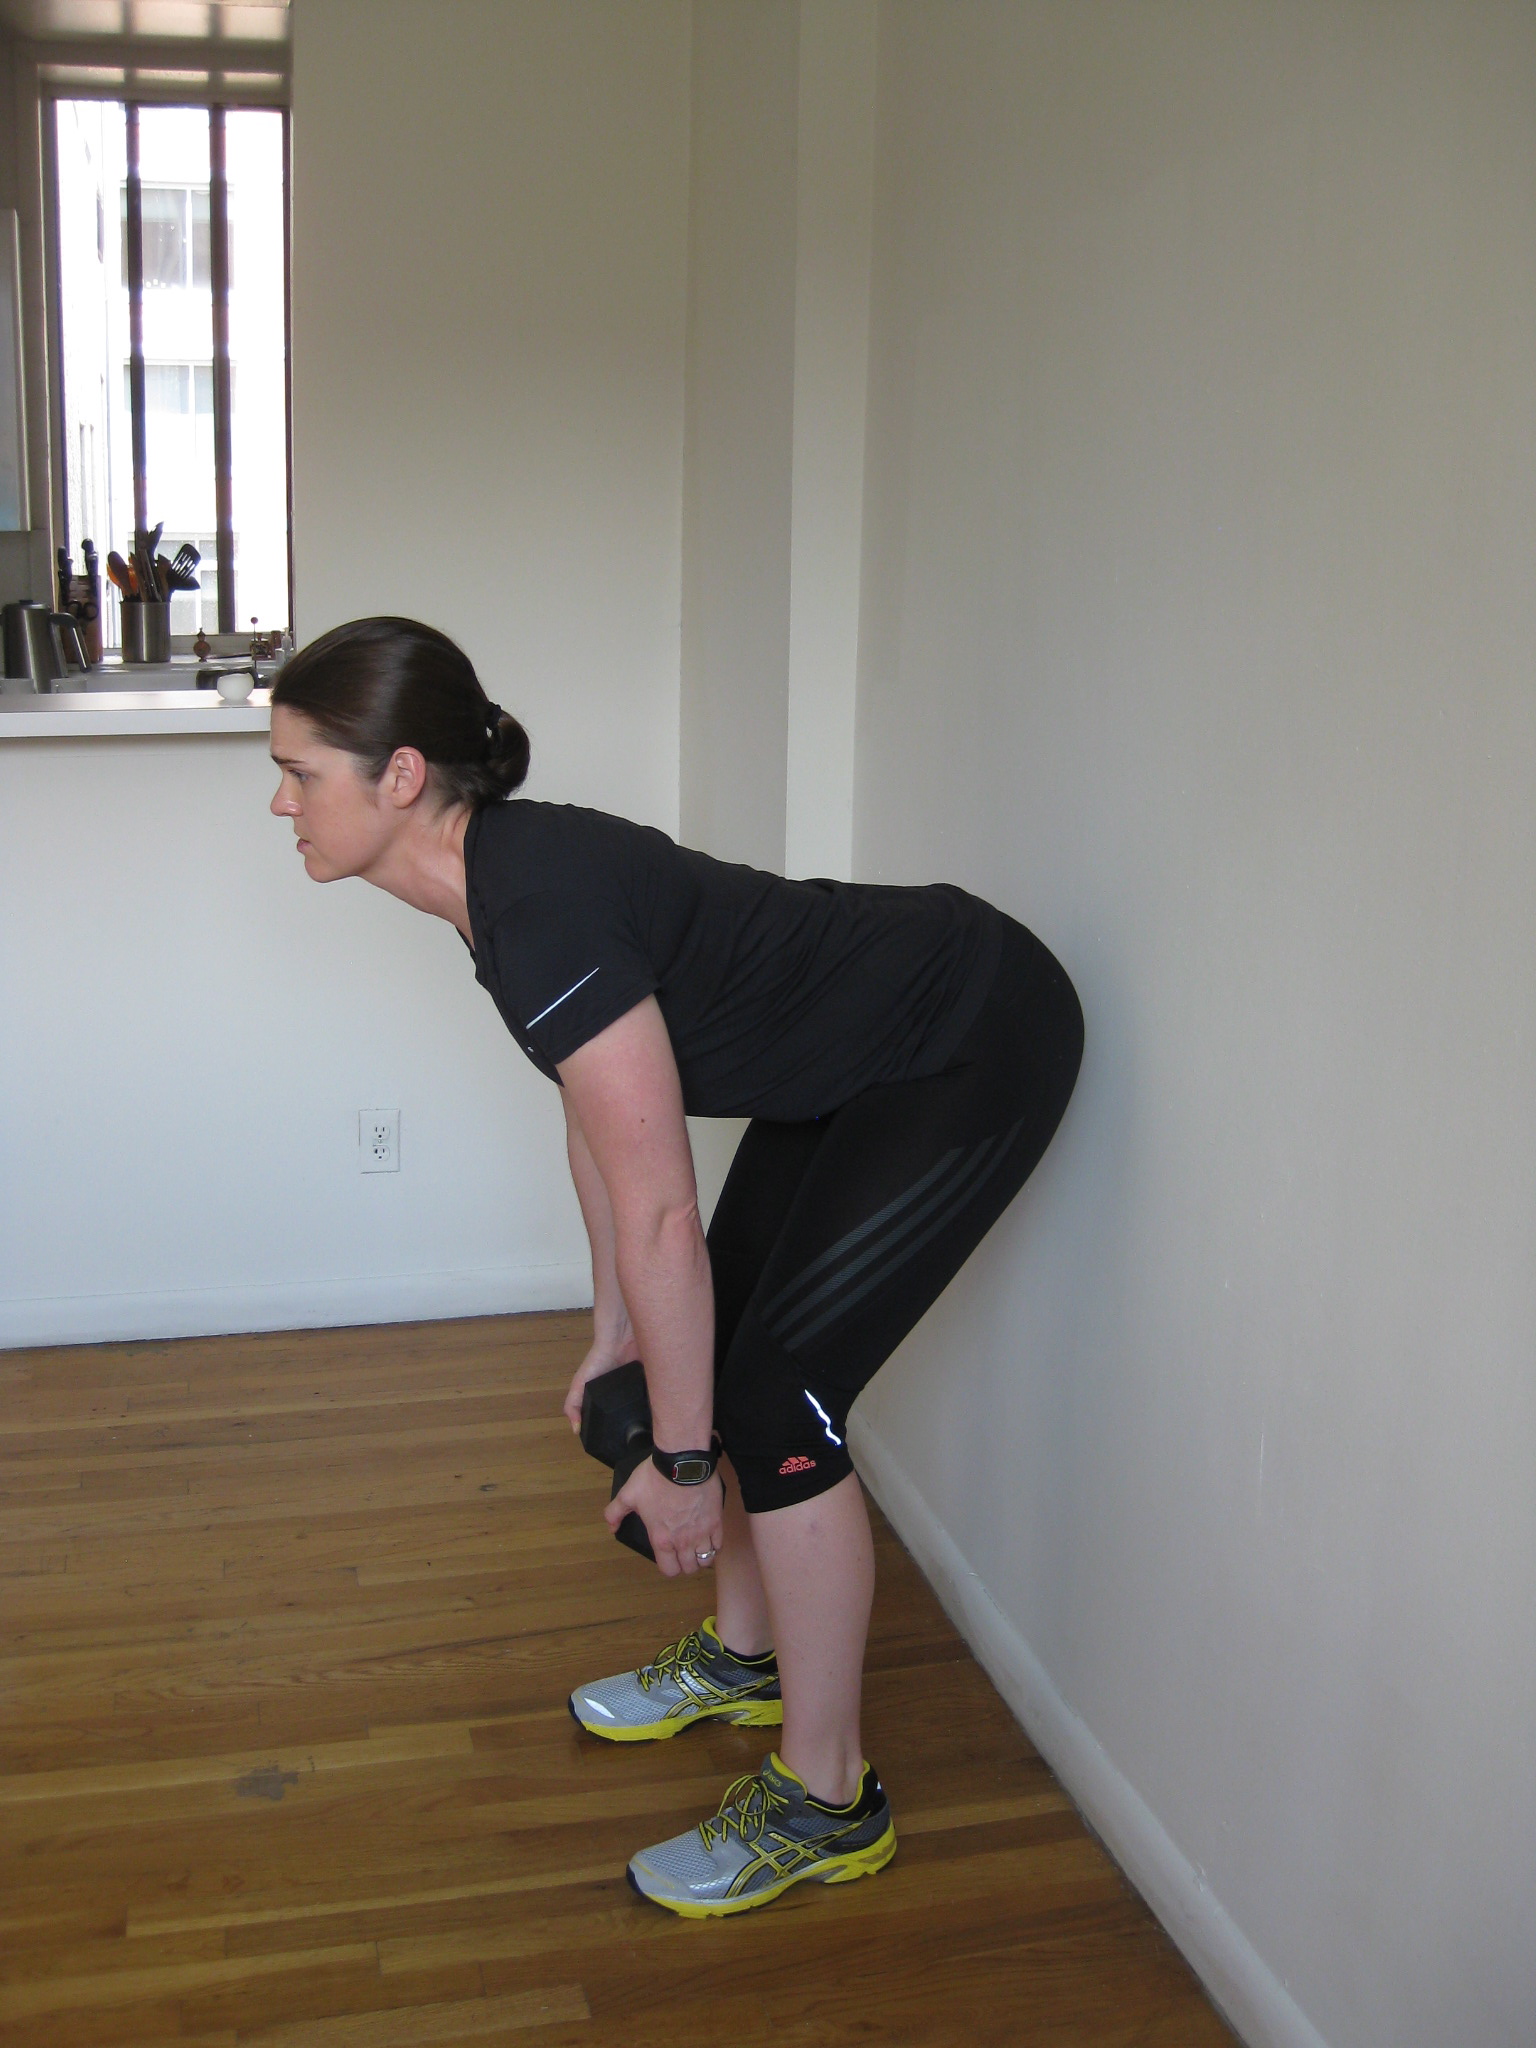
– Hold a barbell with overhand grip, hands shoulder width apart or slightly wider.
– Stand holding the weight in front of your thighs with straight arms and knee slightly bent.
– Push your hips back, slide the bar down your legs until it is just below your knees.
– Keep your arms straight and back flat. Your torso will be at a 45-degree angle to the floor.
– You should feel a big stretch in your hamstrings at this point. Fire your hips forward by squeezing your glutes hard to straighten your body.
Once you learn these basic hinge movements you will have greater hip mobility, stability and strength – then it’s power time!
Kettlebell swings are my favorite way to train the hinge movement pattern and will make a big difference to your performance.
And as a bonus, your glutes will look great all year round…! 😉
OK, quick question. Could you do the glute challenge exercise holding the tennis ball? Let me know in the comments box below.
Enjoy!
KV


2 Replies
Gr8 thanks KATE from Grant who is a massage injury therapist & body flow dynamic PT from Queensland Australia.
Happy to help Grant! 🙂